Queen of Skøelva (Step-by-step)
- Knut Raven

- Jun 21, 2019
- 3 min read

Although this is another one of my pattern designed for my home-river Skøelva, I am sure it will produce in other Scandinavian waters as well under the right conditions. This is without a doubt a fly for bright sunny days. A detailed step-by-step follows below.
Queen of Skøelva
Hook: Double salmon, 4 - 10
Thread: Black
Tail: Golden Pheasant crest
Ribbing: Silver tinsel or wire
Body: First 3/4 of flat silver tinsel, then even parts of yellow and orange-red sealsfur.
Hackle: Doctor blue/sky blue
Wings: 4 - 6 small Golden Pheasant crests.
Step 1: The Thread

Lay down a layer of thread all along the shank of the hook.
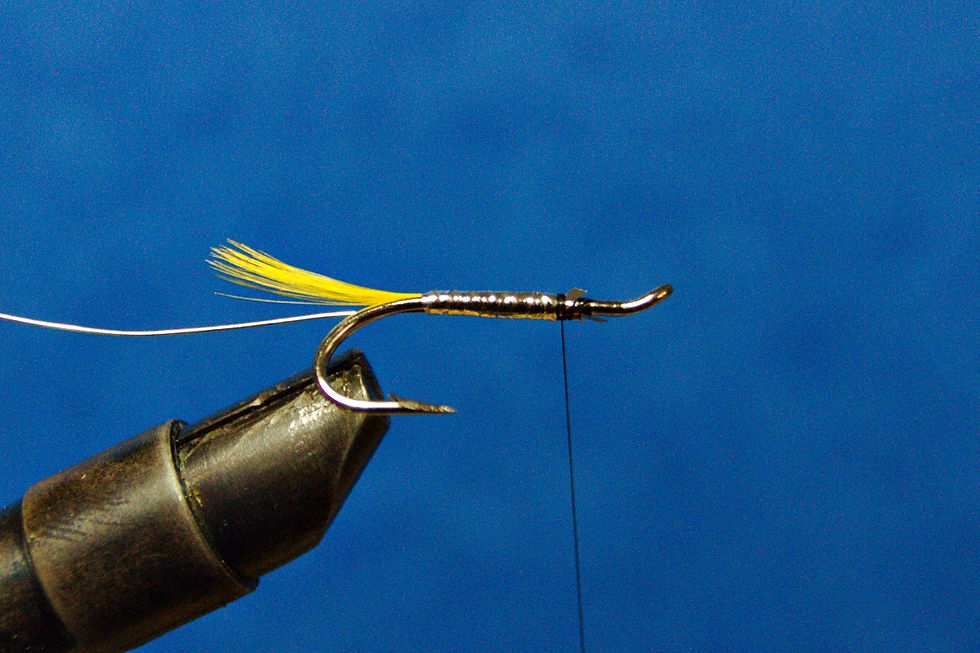
Step 2: The Tail

Tie in two small Golden Pheasant crest feathers for the tail.
Step 3a: Tie in the Ribbing

Tie in a silver wire or oval tinsel for the ribbing. I prefer wire for durability.
Step 3b: Tie in the Ribbing

When using wire, make sure you get in straight on the underside of the hook, this will help maintaining the balance of the fly in the water. It also help for a nicer body, this goes for oval tinsel as well.
Step 4: The silver part of the body

Lay down a layer of adjacent turns of thread forward over three quarters of the body-length, then tie in the flat silver tinsel.
Step 4b: The silver part of the body
Wrap the flat silver tinsel in closing turns back to the joint of the tail, then forward to the tie-in point. Feel free to coat the under-body with a thin layer of superglue before wrapping the tinsel.
Step 5: The yellow sealsfur

Cover half of the remaining body-length of yellow sealsfur dubbing. Notice that I dub this quite bulky, this is to later brush the sealsfur out to create a more translucent effect.
Step 6: The red-orange sealsfur

Do the same as in the previous step with the red-orange sealsfur.
Step 7a: Brush out the dubbing

Brush out the dubbing. A cheap rifle cleaning brush is a wonderful tool for this process.
Step 7b: Brush out the dubbing

Make sure you brush out the dubbing well. Even though the thread shows through, both the wax and the ribbing will keep holding it in place.
Step 8: The Ribbing

Wrap the ribbing in even spaced turns forward. Usually I prefer 5 turns of ribbing, but for this fly I have used 7 turns. Secure the wire well, and this body will last you a long, long time!
Step 9: The Hackle

Measure up a hackle feather dyed Doctor Blue and lay it three turns at most.
Step 10: Prepare the wing

Pick put four to six Golden Pheasant crest feathers just over a hook-length long, or measure on the fly to make sure that the longest crest feathers will reach to the end of the tail. To prepare the crest feathers, trim off the fluff at the bottom, then with your fingernail make a kink in the stem to make it easier to tie them in.
NOTE: As you can clearly see I do not bother selecting straight feathers for this fly. The reason for this is that it just don't matter, as long as you tie them in straight at the bottom. The crest feathers will straighten out after being fished a few times, but the random curves in them also help to create more movement in the fly.
Step 11a: Tie in the wing

Tie in the crest feathers one at the time, and secure only with a turn or two of thread. Make sure that the bottom of the stem is parallel with the hook shank when seen from above, and ignore any curves further up in the crest feather. At this point I have tied in three of the five feathers.
Step 11b: Tie in the wing

All five crest feathers are now tied in.
Step 12: Trim off the ends

Take care when trimming off the waste ends of the crest feathers. Do them one at the time, and in a tapered fashion, so that the bottom stem is longer than the one above and so on.
After trimming the ends, but before you lay down the final thread wraps to shape the head, add a drop off thin superglue to the head, and then wrap the thread over the ends before the superglue sets, this makes for a very strong fly.
Step 13: Finish your fly

When your head is done, tie off with a few turns of whip-finish, cut the thread and varnish the head. Tight lines!

# # # # #
All photos are taken by me and shall not be used without permission.


Comments